I want a totally, 100% free certificate so I’m going to use StartSSL class 1 certificate. Before you go ahead, please check StartSSL / StartCom reviews and their policies (recommended).
Limitations of StartSSL Free: While certificates are free for certain uses, there are limitations imposed unless an upgrade is purchased.
- One-year certificate validity (new certificate can be issued for free at any time).
- One domain plus one host name per certificate (e.g. www.yourDomain.com and yourDomain.com, or www.service.yourDomain.com and yourDomain.com).
- No commercial use
- Certificate revocation requires a fee
Previous:
Next:
Part 2/2 - Configure SSL on nginx web server
Synopsis: Topics covered are, roughly. A. Signup for StartSSL B. Get domain validated C. Private Key & Certificate Signing Request (CSR) D. Prepare a unified certificate & protect private key
One needs to signup StartSSL & if you haven’t done so for, here is a blog to signup for startSSL. Signup for StartSSL . Signup then come back to this post again to continue.
Once you signup & certificate is installed on your browser, StartSSL will be able to authenticate you.
Validations Wizard:
-
You should be able see these tabs on screen after signup.
 In case you don’t see above tabs then click on ‘Control Panel’ on right corner then on ‘Authenticate’.
 Click on ‘Validations Wizard’. We are going validate our domain so select ‘Domain Name Validation’ from drop down.

-
Enter your domain name

-
Choose email address you have access to

This gets bit tricky. If You have chosen to hide your email id by proxy (as I did) while registering the domain then you will see last option as proxy mail id, else you should see your email id. Select last option and you will get mail forwarded by proxy mail id to your email id.
- Domain Verification code

You should receive an email with verification code as below.

Copy verification code from email and paste it in StartSSL verification code input box. Click on ‘Continue’ button.
- Validation Success!

Wow! we have successfully validated our domain. Let’s get private key and certificate for the domain.
Certificates Wizard:
-
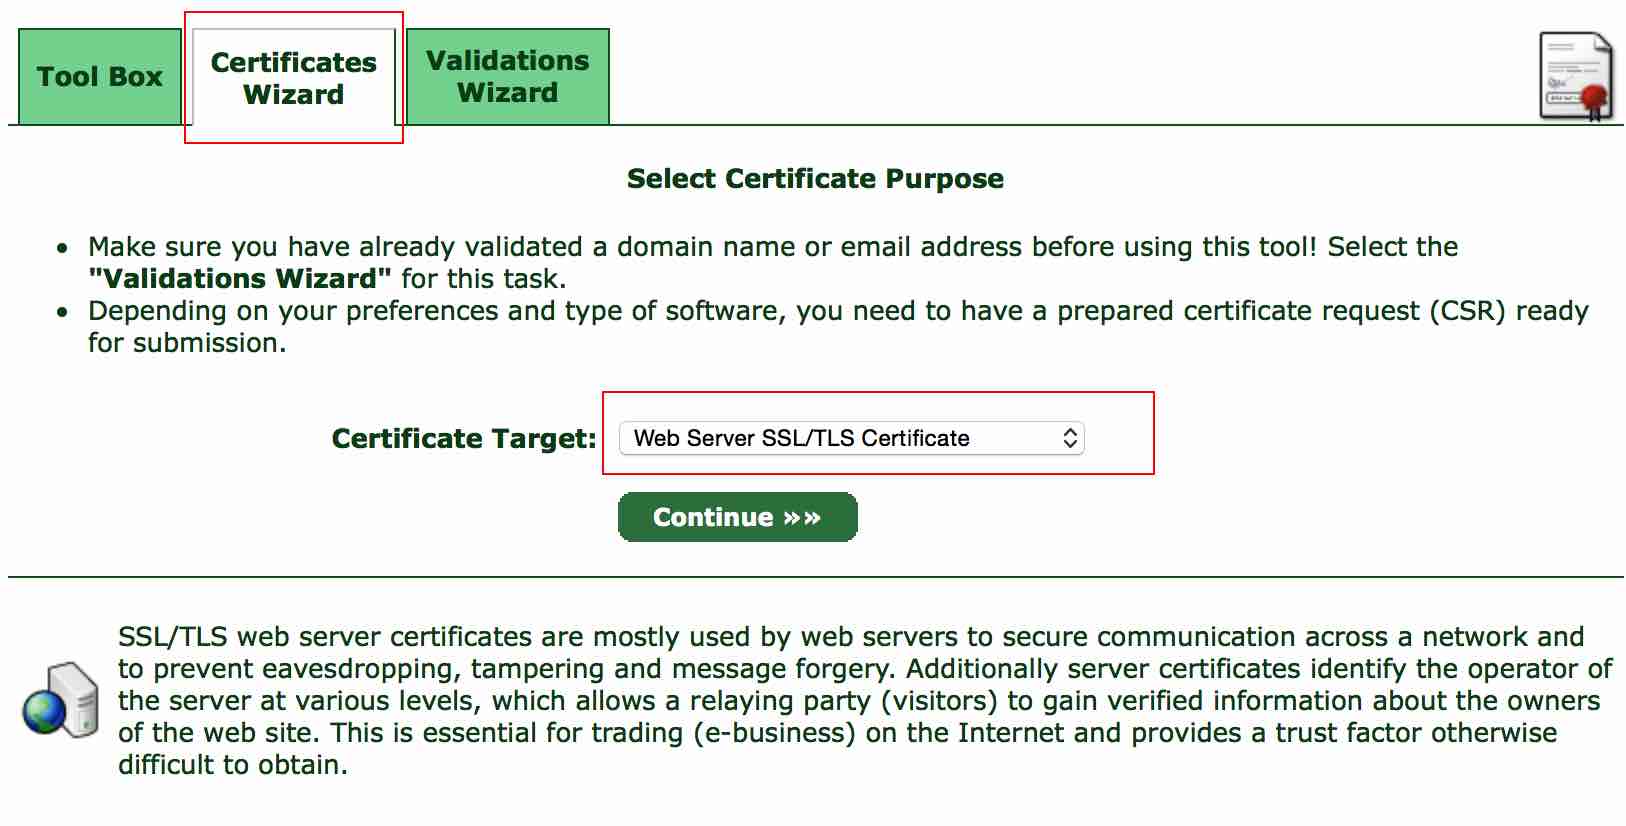
Click on ‘Certificates Wizard’
 Then select ‘Web Server SSL/TLS Certificate’ from drop down in ‘Certificate Target’ field. Click on ‘Continue’ button.
 -
Generate Private Key
 Enter key password and note it down somewhere safe. You are gonna need it later. Keep key size 2048 for better security and performance. Click on ‘Continue’ button.
 -
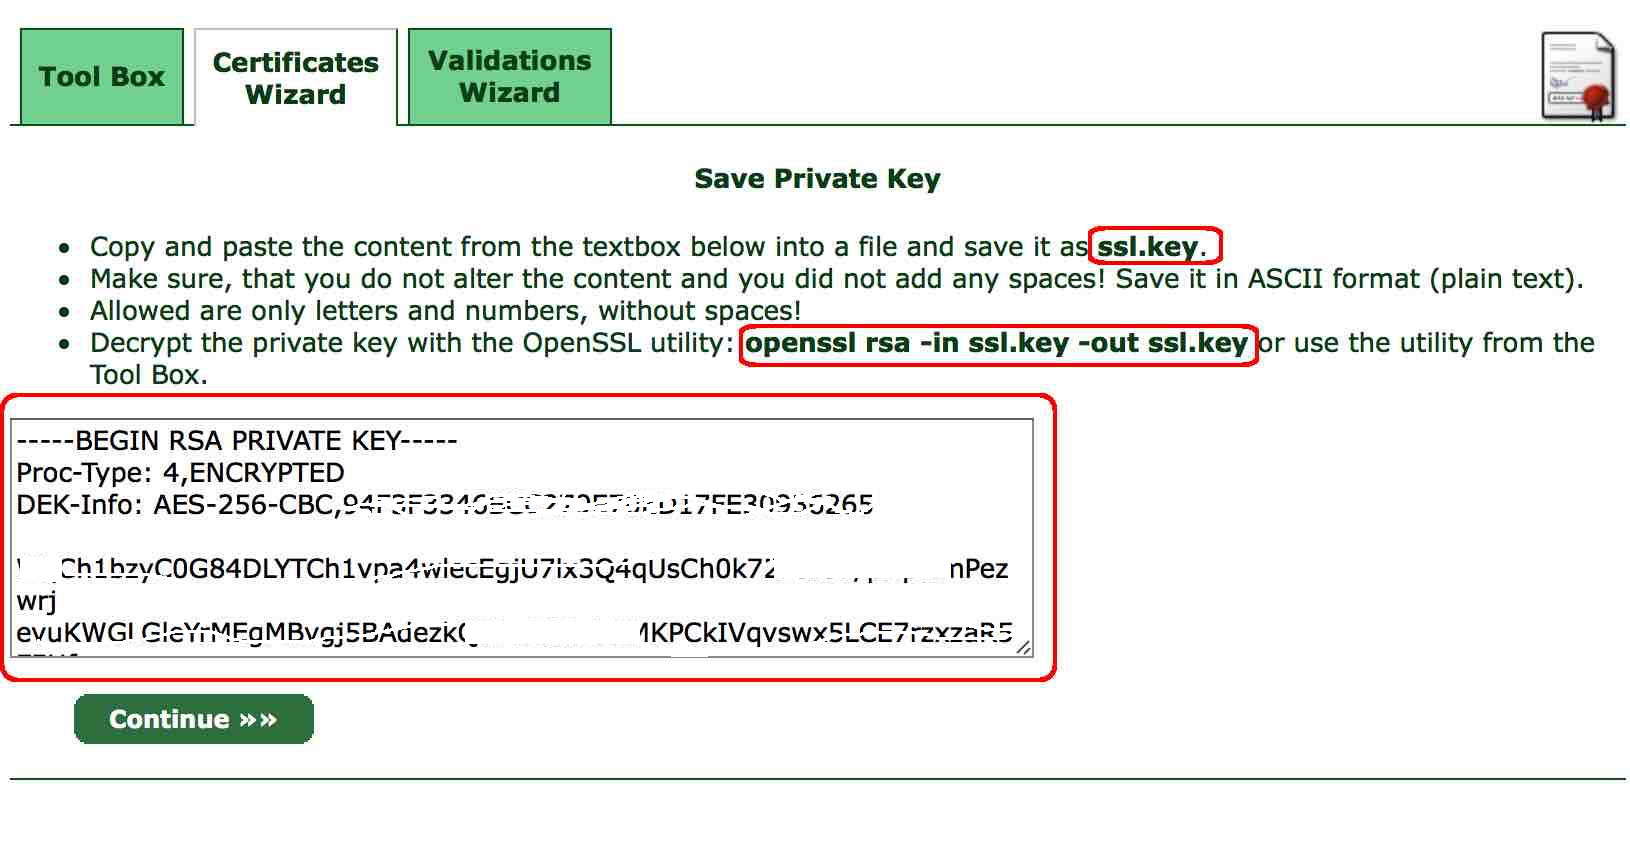
Save Private Key & Decrypt the key as per instruction.
 You got private key for your domain. Keep it safe place where only you can access it. Click on ‘Continue’ button.
 -
Select your validated domain from drop down option.
 Click on ‘Continue’ button.
 -
Add one subdomain
 Choose subdomain name you want to add, wisely. You will be able to access your bare domain and one subdomain only through the certificate. I used ‘www’ subdomain, so that user should be able to use my website with or without ‘www’. But you are free to choose any subdomain of your choice.
Click on ‘Continue’ button.
 -
Ready for certificate
 Click on ‘Continue’ button.
 -
Wait for email confirmation

I got email within 15 mins.
 Email confirms that Certificate has been issued for your bare domain & one subdomain. Let’s go and grab it.
Tool Box:
-
Click on ‘Tool Box’ then ‘Retrieve Certificate’

-
Select Certificate
 Certificate is available to retrieve named on subdomain. Select & click on ‘Continue’ button.
 -
Copy Certificate and save it with name ssl.crt

-
Get StartCom CA Certificates
 Get root and intermediate certificates. You need both certificates along with your subdomain certificate, to create a unified certificate.
Alternatively use below commands to get root and intermediate certificates.
wget http://www.startssl.com/certs/ca.pem wget http://www.startssl.com/certs/sub.class1.server.ca.pem -
Create a unified certificate from your certificate and the CA certificates
cat ssl.crt sub.class1.server.ca.pem ca.pem > ssl-unified.crtssl-unified.crt will be certificate for your domain & a subdomain. -
Protect your key from prying eyes
chmod 600 ssl.key
We have ssl.key (Private Key) & ssl-unified.crt (Certificate). Let’s configure web server (nginx) to use these two and configure for https along with some other security stuff in 2nd and last part of the series. Part 2/2 - Configure SSL on nginx web server
 In case you don’t see above tabs then click on ‘Control Panel’ on right corner then on ‘Authenticate’.
 Click on ‘Validations Wizard’. We are going validate our domain so select ‘Domain Name Validation’ from drop down.


 Then select ‘Web Server SSL/TLS Certificate’ from drop down in ‘Certificate Target’ field. Click on ‘Continue’ button.
 Enter key password and note it down somewhere safe. You are gonna need it later. Keep key size 2048 for better security and performance. Click on ‘Continue’ button.
 You got private key for your domain. Keep it safe place where only you can access it. Click on ‘Continue’ button.
 Click on ‘Continue’ button.
 Choose subdomain name you want to add, wisely. You will be able to access your bare domain and one subdomain only through the certificate. I used ‘www’ subdomain, so that user should be able to use my website with or without ‘www’. But you are free to choose any subdomain of your choice.
Click on ‘Continue’ button.
 Click on ‘Continue’ button.

 Certificate is available to retrieve named on subdomain. Select & click on ‘Continue’ button.
 Get root and intermediate certificates. You need both certificates along with your subdomain certificate, to create a unified certificate.
Alternatively use below commands to get root and intermediate certificates.